
Did you know that one shot (1 oz.) of whiskey contains almost 30,000 1-microliter droplets?
Our research analyzes the microstructures that remain after a single microdrop of bourbon has been evaporated.
Go to our News & Events page to view websites and articles available to the general public. Below are technical publications related to whiskey webs.
Science Articles (Journal Articles)
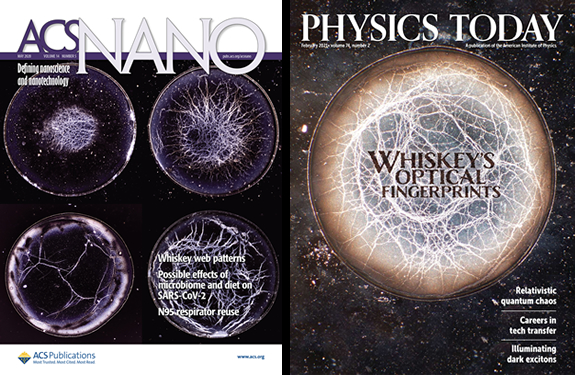
- Whiskey webs: Fingerprints of evaporated bourbon Physics Today 2021.
- Multiscale self-assembly of distinctive weblike structures from evaporated drops of dilute american whiskeys
ACS Nano 2020.
Free to download and read! - Whiskey webs: Microscale "fingerprints" of bourbon whiskey Phys. Rev. Fluids 4, 100511, 2019.
Our work was featured on Bourbon Pursuit's podcast , "317 - The science of whiskey webs with Stuart Williams from the University of Louisville".
There is a brief five-minute video available to download that highlights our ACS Nano article. (mp4 file)
Here is a TV segment created by Mark Hebert for "UofL Today with Mark Hebert".
February 2021:
I have updated the 'at home' protocol. The primary challenges associated with the April 2020 post (below) was (i) a clean hydrophobic surface and (ii) phase-contrast lighting. To answer this I have created a 'light box' to be used with a patterned teflon slide (pictured below). These updated at-home kits will be available soon after they have been evaluated and modified.

April 2020:
If you are reading this then you must be interested in making your own whiskey web at home! I developed this initial procedure at home in March of 2020, during COVID19. I will tell you what I have done and what I have learned. If you are successful please email me your images and your procedure, I am interested in improving this!
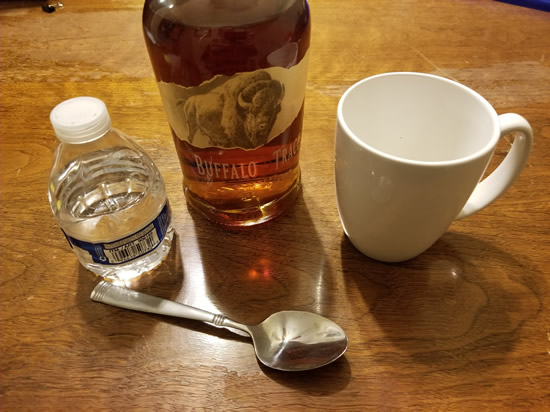
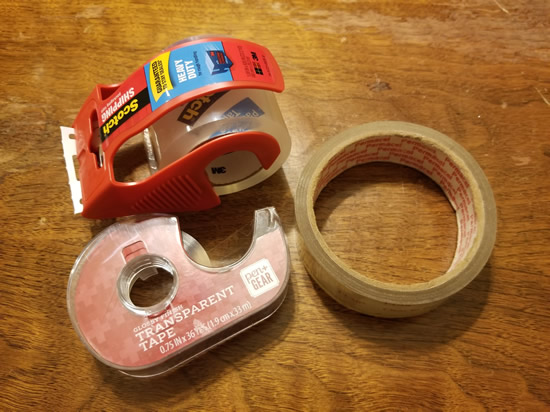
I focused on materials that you may have round the home. Here is a list of materials you will need, and their purpose:
Now that you have gathered everything, here is what you do:
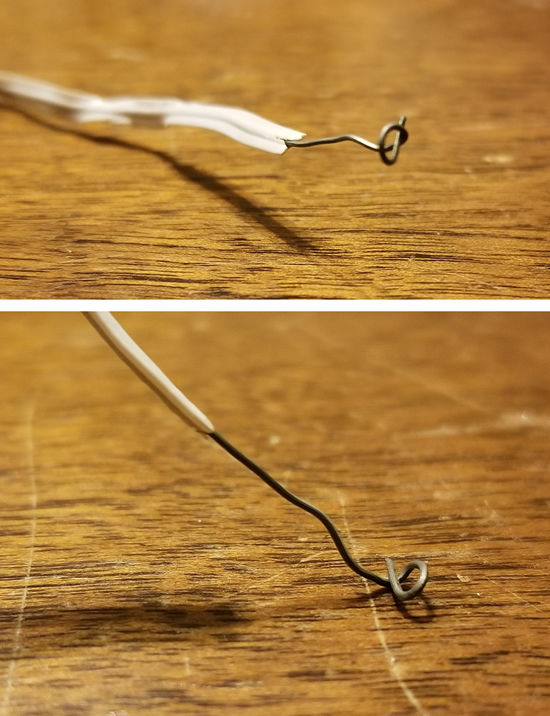
1. Take the exposed end of twist tie and make a loop at its end at the tip. The diameter of the loop needs to be small, I used the tip of a ballpoint pen to form mine. Refer to my images below.
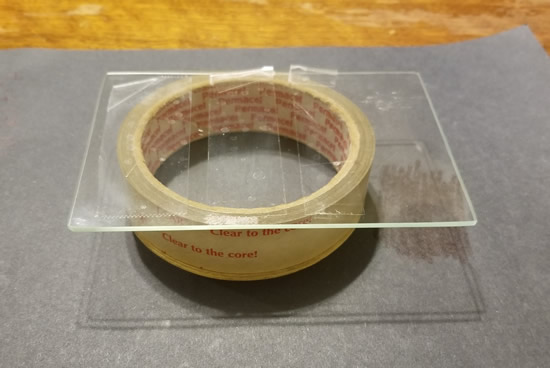
2. Apply the tape to the glass plate. Avoid fingerprints and scratches, you want the surface to be as clean and transparent as possible. You may wipe and clean it, but be careful to avoid smudges and streaks.
3. Measure and mix your bourbon and water to the appropriate ratio to get 40-50 proof, sometimes 30-60 proof will work. Below is an equation that will guide your dilution.

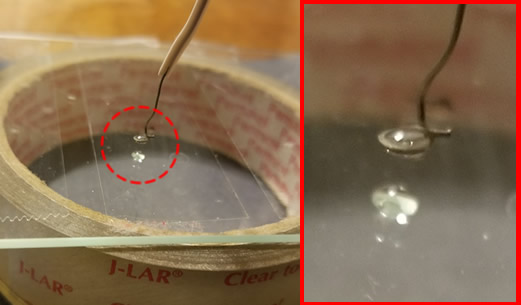
4. Set your glass plate on a flat surface. Submerge your wire loop into the liquid and carefully pull it out. You should see a droplet trapped within the loop (hooray for surface tension!). Take this droplet over to the tape and carefully ‘tap’ the plate, transferring the drop. Do not smear or spread the drop – you want it as ‘balled up’ as possible. Repeat the process to create as many drops as you like, not all of them will form webs using this approach. I highly recommend adding to an existing drop two or three times, making it bigger and ‘ball up’ more.
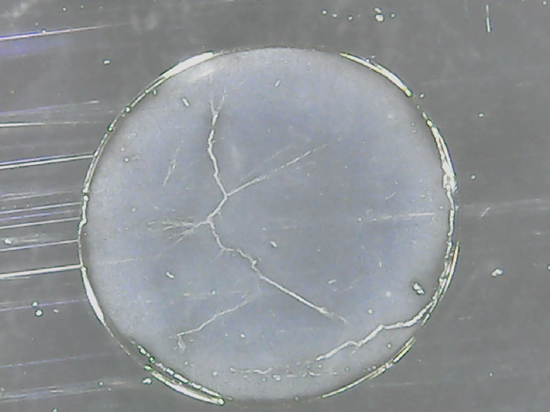
5. Let the drops evaporate. Environmental conditions matter (do not breathe on it!), so I covered mine with a bowl during evaporation. It will take at least ten minutes, up to an hour, for the drops to evaporate. Evaporation depends on the size of the droplet, temperature, and humidity.
6. Drink your remaining bourbon dilution (optional).
7. Take the evaporated glass plate and elevate it above the black background. The elevation is to make the dark background blurry such that the background elements don’t interfere with your droplet image. I used a roll of tape to elevate my glass plate.
8. Take a picture! You will need a steady hand. Also, be aware that you may scratch some of your droplets while you position your camera.
Cleanliness matters! If your mixing cup is dusty or your glass plate has residue your results will be impacted.
You are imaging the features using scattered light. This means that the light is coming in laterally and is reflecting off of the features. You may be able to alter the lighting and background to optimize your contrast.
Good luck! Email me your images and describe your approach at stuart dot williams at louisville dot edu.
|
|
 Gallery
|
 The Science!
|
 News & Events
|
 Contact
|